Table of Contents
Introduction
Want to build project using Docker? Docker is transforming the way developers build and deploy applications by providing an efficient and portable solution through containers. This guide will take you through the process of building a project using Docker from scratch, ensuring you understand each step and its purpose.
What is Docker?
Docker is a containerization platform that packages applications and their dependencies into isolated environments called containers. This allows for consistent performance across development, testing, and production environments.
Why Use Docker?
- Consistency: Prevent environment-specific bugs by running the same container across all systems.
- Efficiency: Containers are lightweight and start faster than virtual machines.
- Scalability: Easily scale and manage your applications in any infrastructure.
Prerequisites
Ensure you have the following before starting:
- Docker installed on your system (Get Docker)
- Basic familiarity with the command line
- A code editor like Visual Studio Code
Step 1: Set Up Your Project Environment
1. Open a terminal and create a new project directory:
mkdir docker-demo && cd docker-demo
2. Organize the project structure:
touch index.html Dockerfile
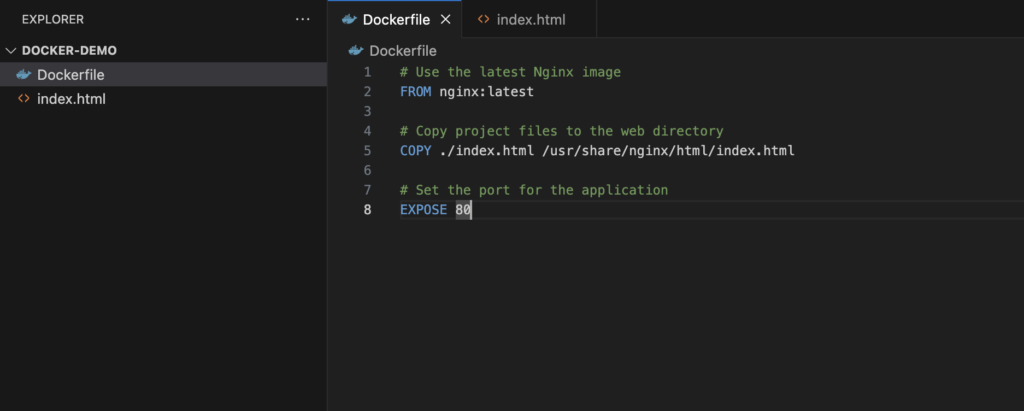
Step 2: Writing a Dockerfile
A Dockerfile defines the instructions for building a Docker image.
1. Open the Dockerfile and insert the following lines:
# Use the latest Nginx image
FROM nginx:latest

# Copy project files to the web directory
COPY ./index.html /usr/share/nginx/html/index.html

# Set the port for the application
EXPOSE 80
2. Save the file.

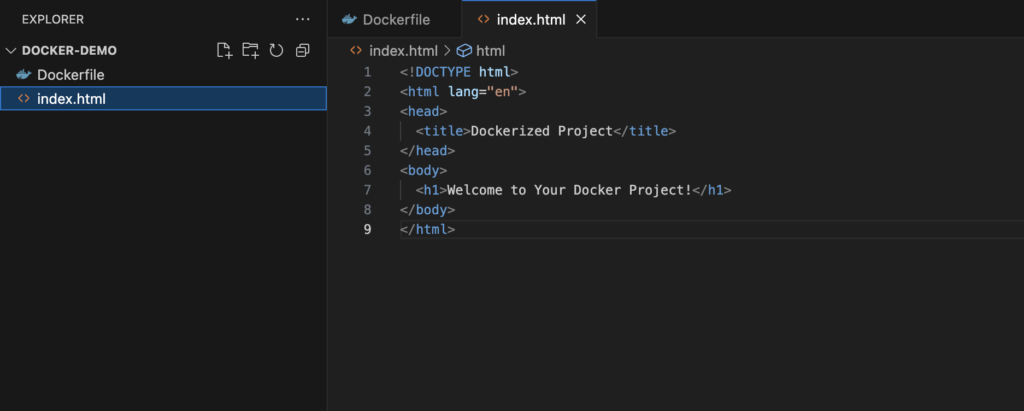
Step 3: Build the Web Application
1. Open index.html and add simple HTML content:
<!DOCTYPE html>
<html lang="en">
<head>
  <title>Dockerized Project</title>
</head>
<body>
  <h1>Welcome to Your Docker Project!</h1>
</body>
</html>
2. Save the file.

Step 4: Build and Run the Docker Container
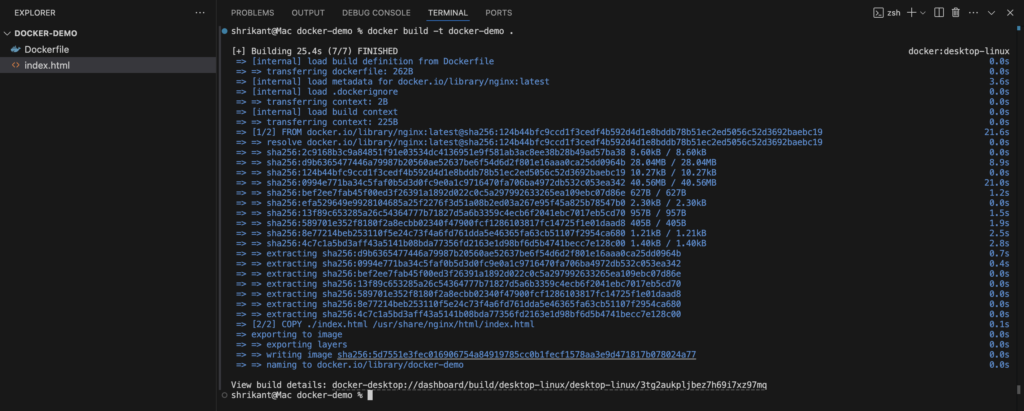
1. Build a Docker image with a custom name:
docker build -t docker-demo .
2. Confirm the image was created:
docker images
3. Launch the container:
docker run -d -p 8080:80 docker-demo
4. Open http://localhost:8080 in your browser to see your app in action.
Step 5: Docker Container Management
View Active Containersdocker psStop a Running Container
docker stop <container_id>Delete a Stopped Container
docker rm <container_id>Clean Up Docker Images
docker rmi docker-demoConclusion
You have successfully learned how to build project using Docker. With Docker, you can easily package applications, ensure consistent environments, and streamline the deployment process. Continue exploring Docker’s advanced features to enhance your development workflow.
Additional Resources
For those interested in expanding their skills with APIs, check out our Top 10 Free APIs for Practice in 2025 and improve your JavaScript mastery with our Master ES6 JavaScript – Complete Guide at Master ES6 JavaScript – Complete Guide.
