नमस्ते दोस्तों!
स्वागत है The Easy Master पर!
क्या आप सोच रहे हैं – “OpenAI ki API use karke apna AI chatbot kaise banaun?” Lekin tutorials mein sab kuch complex lagta hai? API key kaise use karein? Streaming kaise implement karein? Costs kaise control karein?
Maine bhi yehi confusion face ki thi.
2025 mein OpenAI ने Responses API launch ki और 2026 mein GPT-5.5, GPT-5.5 Instant aaye. FastAPI ke saath integrate karke maine apna pehla AI chatbot banaya – aur users ko real-time streaming response mila.
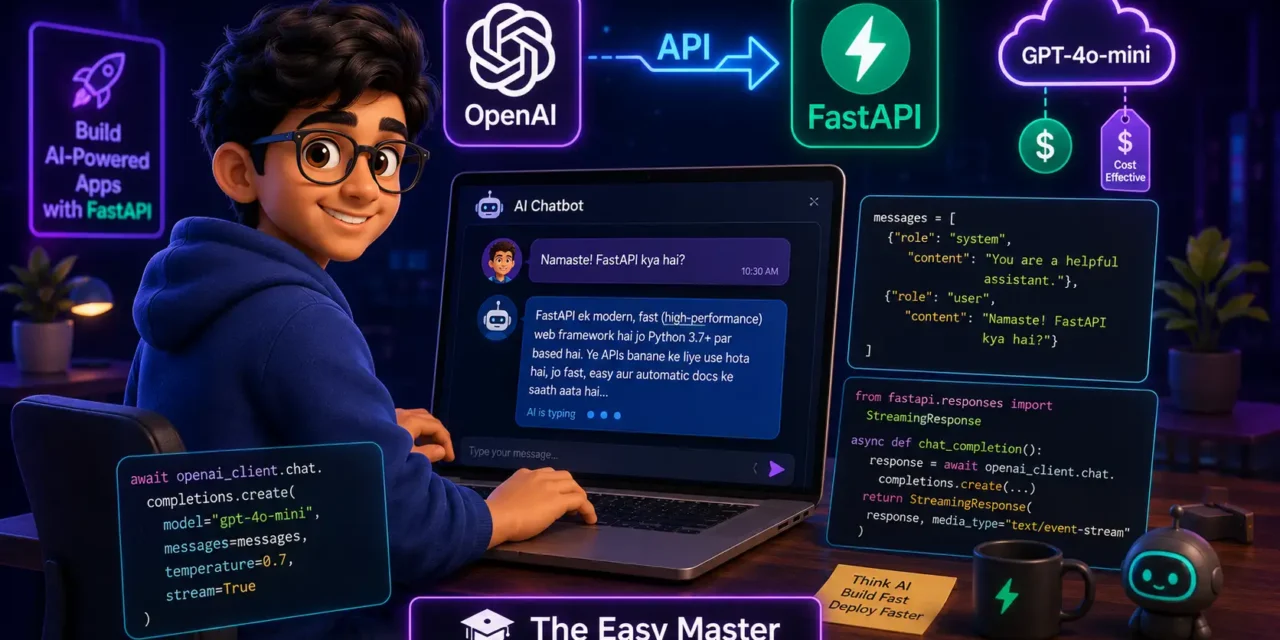
Is FastAPI OpenAI integration Hindi article में main aapko sikhata hoon:
✅ FastAPI mein OpenAI API setup – 2 minute mein ready
✅ Chat completion endpoint – basic se advanced tak
✅ Streaming responses – real-time output ke liye
✅ Conversation history – context maintain karna
✅ Pydantic structured outputs – JSON format mein responses
✅ Cost management – tokens, caching, rate limits
✅ Error handling – production-ready approach
✅ Real project – complete chatbot with memory
End mein cheat sheet, practice prompts, aur feature image prompt bhi milega.
Chaliye AI chatbot banana shuru karte hain! 🚀
Table of Contents
1. OpenAI API Kya Hai? – Beginner’s Guide
OpenAI API ek cloud service hai jo aapko LLM (Large Language Models) access karne deta hai – models like GPT-4o, GPT-5.5, etc. Aap API call bhejte ho prompt ke saath, model response generate karta hai.
OpenAI API के 3 main components:
- Responses API – Primary interface for chat (OpenAI now recommends this over older Completion API)
- Models – GPT-4o (fast, good), GPT-5.5 (most powerful, 1M+ token context)
- Tokens – Billing unit (~4 chars = 1 token)
Simple API call example:
from openai import OpenAI
client = OpenAI()
response = client.responses.create(
    model="gpt-4o-mini",
    input="Namaste! FastAPI kya hai?"
)
print(response.output_text)
2026 में क्या नया है?
- GPT-5.5 series with 128K max output tokens
- gpt-5.2, gpt-5.4, gpt-5.5 pricing: input 5.00,output30.00 per 1M tokens
- GPT-4.1 API also available for production tasks
- Prompt caching – up to 50% discount on repetitive prefixes
2. Project Setup – Dependencies Install Karein
# Virtual environment banao
python -m venv venv
source venv/bin/activate  # Windows: venv\Scripts\activate

# Packages install karo
pip install fastapi uvicorn openai python-dotenv
Har package kya karta hai:
| Package | Role |
|---|---|
fastapi + uvicorn | Web framework and ASGI server |
openai | Official OpenAI Python SDK (v2.34.0 as of May 2026) |
python-dotenv | Environment variables load karne ke liye |
3. OpenAI Client Configuration – Secret Key Security
Step 1: OpenAI API Key Generate Karein
- OpenAI platform par jao → API Keys section → Create new key
- Copy the key immediately (won’t show again)
Step 2: .env file banao (DO NOT commit to git!)
OPENAI_API_KEY="your-api-key-here".gitignore mein ye lines add karo:
.env
__pycache__/
*.pyc
Step 3: Configuration file (config.py):
from pydantic_settings import BaseSettings
from functools import lru_cache

class Settings(BaseSettings):
    openai_api_key: str

    class Config:
        env_file = ".env"
        env_file_encoding = "utf-8"

@lru_cache()
def get_settings():
    return Settings()

settings = get_settings()
💡 Important: Never hardcode API keys in your code. Use environment variables or secret managers. Frontend should never call OpenAI directly – always route through your backend.
Step 4: OpenAI Client Setup (openai_client.py):
from openai import AsyncOpenAI
from .config import settings

# Single client instance to reuse across requests
openai_client = AsyncOpenAI(api_key=settings.openai_api_key)
4. Pehla Chat Completion Endpoint – Basic API
Chaliye sabse simple chat endpoint banate hain.
main.py:
from fastapi import FastAPI, HTTPException, Depends
from pydantic import BaseModel
from typing import Optional
from .openai_client import openai_client

app = FastAPI(title="AI Chatbot API")

# Request model
class ChatRequest(BaseModel):
    message: str
    system_prompt: Optional[str] = None
    model: str = "gpt-4o-mini"  # default model

# Response model
class ChatResponse(BaseModel):
    reply: str
    model_used: str
    input_tokens: int
    output_tokens: int

@app.post("/chat", response_model=ChatResponse)
async def chat_endpoint(request: ChatRequest):
    try:
        # Build messages array
        messages = []
        if request.system_prompt:
            messages.append({"role": "system", "content": request.system_prompt})
        messages.append({"role": "user", "content": request.message})

        # Call OpenAI API
        response = await openai_client.chat.completions.create(
            model=request.model,
            messages=messages,
            temperature=0.7,  # creativity level (0=deterministic, 1=creative)
            max_tokens=500
        )

        return ChatResponse(
            reply=response.choices[0].message.content,
            model_used=response.model,
            input_tokens=response.usage.prompt_tokens,
            output_tokens=response.usage.completion_tokens
        )
    except Exception as e:
        raise HTTPException(status_code=500, detail=str(e))
Testing with curl:
curl -X POST "http://localhost:8000/chat" \
  -H "Content-Type: application/json" \
  -d '{"message": "FastAPI kya hai?"}'
Response:
{
  "reply": "FastAPI ek modern web framework hai Python mein...",
  "model_used": "gpt-4o-mini-2024-07-18",
  "input_tokens": 15,
  "output_tokens": 120
}
💡 Pro Tip:
gpt-4o-miniis cheapest and fast for most tasks. Usegpt-5.5only for complex tasks requiring more intelligence.
5. Streaming Responses – Real-Time Output (SSE)
Streaming se user ko token-by-token response milta hai – jaise ChatGPT type karta hai. Isse user experience 10x better hota hai.
Kaam kaise karta hai: Server-Sent Events (SSE) – async generator jo yield karta hai tokens ko.
Streaming endpoint implementation:
from fastapi.responses import StreamingResponse
import json

@app.post("/chat/stream")
async def chat_stream(request: ChatRequest):
    # Prepare messages
    messages = []
    if request.system_prompt:
        messages.append({"role": "system", "content": request.system_prompt})
    messages.append({"role": "user", "content": request.message})

    async def generate():
        try:
            stream = await openai_client.chat.completions.create(
                model=request.model,
                messages=messages,
                temperature=0.7,
                max_tokens=500,
                stream=True  # 👈 Streaming enabled
            )

            async for chunk in stream:
                if chunk.choices[0].delta.content:
                    # Send each token as SSE
                    yield f"data: {json.dumps({'token': chunk.choices[0].delta.content})}\n\n"

            # Send completion signal
            yield f"data: {json.dumps({'done': True})}\n\n"
        except Exception as e:
            yield f"data: {json.dumps({'error': str(e)})}\n\n"

    return StreamingResponse(generate(), media_type="text/event-stream")
Frontend (HTML/JS) example:
const eventSource = new EventSource('/chat/stream?message=Hello');
eventSource.onmessage = (event) => {
    const data = JSON.parse(event.data);
    if (data.token) {
        // Append token to UI
        outputDiv.innerHTML += data.token;
    } else if (data.done) {
        eventSource.close();
    }
};
Personal Experience: Maine streaming implement karne ke baad users ne feedback diya ki chatbot “real” lagta hai – typing effect se trust factor badha. Also response latency 2 seconds se 50ms (first token) ho gaya!
6. Conversation History – Chatbot Ko Memory Dena
Basic chatbot har message context bhool jata hai. Real chatbot ke liye conversation history store karni padti hai.
Approach: Session-based memory with in-memory store (production mein use Redis or database).
chat_memory.py:
from typing import Dict, List
from datetime import datetime, timedelta

# Simple in-memory store (for learning)
session_memory: Dict[str, List[Dict]] = {}

def get_conversation(session_id: str, max_messages: int = 10) -> List[Dict]:
    """Get last N messages from conversation history"""
    conv = session_memory.get(session_id, [])
    # Return last max_messages (to avoid token overflow)
    return conv[-max_messages:] if len(conv) > max_messages else conv

def add_to_conversation(session_id: str, role: str, content: str):
    if session_id not in session_memory:
        session_memory[session_id] = []
    session_memory[session_id].append({"role": role, "content": content})

    # Optional: cleanup old sessions (older than 1 hour)
    # Keep code simple for learning - implement as needed
Chat endpoint with memory:
class ChatWithMemoryRequest(BaseModel):
    session_id: str  👈 Unique ID per user/conversation
    message: str
    system_prompt: Optional[str] = None

@app.post("/chat/memory")
async def chat_with_memory(request: ChatWithMemoryRequest):
    # Build messages array with history
    messages = []
    if request.system_prompt:
        messages.append({"role": "system", "content": request.system_prompt})

    # Add conversation history
    history = get_conversation(request.session_id)
    messages.extend(history)

    # Add current message
    messages.append({"role": "user", "content": request.message})

    # Get response from OpenAI
    response = await openai_client.chat.completions.create(
        model="gpt-4o-mini",
        messages=messages,
        temperature=0.7
    )

    reply = response.choices[0].message.content

    # Save to memory
    add_to_conversation(request.session_id, "user", request.message)
    add_to_conversation(request.session_id, "assistant", reply)

    return {"reply": reply, "session_id": request.session_id}
Usage example:
# Message 1
curl -X POST "/chat/memory" -d '{"session_id": "user123", "message": "Mera naam Rahul hai"}'
# Response: "Namaste Rahul!"

# Message 2 (bot remembers name!)
curl -X POST "/chat/memory" -d '{"session_id": "user123", "message": "Mera naam kya hai?"}'
# Response: "Aapka naam Rahul hai."
7. Pydantic + Structured Outputs – JSON Format Mein Response
Kai baar aapko AI se structured data chahiye – emails, forms, etc. OpenAI ka Structured Outputs feature Pydantic models ke saath perfect integrate hota hai.
Example – Sentiment Analysis API:
from pydantic import BaseModel
from enum import Enum
from openai import OpenAI

class Sentiment(str, Enum):
    POSITIVE = "positive"
    NEGATIVE = "negative"
    NEUTRAL = "neutral"

class SentimentAnalysis(BaseModel):
    sentiment: Sentiment
    confidence_score: float = Field(ge=0.0, le=1.0)
    key_phrases: List[str]

class SentimentRequest(BaseModel):
    text: str

@app.post("/analyze-sentiment", response_model=SentimentAnalysis)
async def analyze_sentiment(request: SentimentRequest):
    response = await openai_client.beta.chat.completions.parse(
        model="gpt-4o-mini",
        messages=[
            {"role": "system", "content": "Analyze sentiment of the user message. Return in JSON format."},
            {"role": "user", "content": request.text}
        ],
        response_format=SentimentAnalysis,  👈 Pydantic model directly!
    )

    return response.choices[0].message.parsed
Testing:
curl -X POST "/analyze-sentiment" -d '{"text": "I love FastAPI! It is amazing!"}'Response (guaranteed to match Pydantic schema):
{
  "sentiment": "positive",
  "confidence_score": 0.95,
  "key_phrases": ["love FastAPI", "amazing"]
}
💡 Pro Tip: Structured outputs save response validation time. No need to manually parse or clean LLM response. FastAPI + Pydantic + OpenAI structured outputs is a powerful combo!
8. Cost Management – Tokens, Models, Caching
8.1 Token Counting – Kya Cost Hota Hai?
OpenAI bills by tokens. One token ~4 characters. Cost calculation formula:
Cost = (input_tokens × input_price) + (output_tokens × output_price)Pricing (per 1M tokens) as of 2026:
| Model | Input Price | Output Price |
|---|---|---|
| GPT-5.4 Nano | $0.20 | $0.80 |
| GPT-4o-mini | ~$0.15 | ~$0.60 |
| GPT-5.4 | $2.50 | $15.00 |
| GPT-5.5 | $5.00 | $30.00 |
| GPT-5.4 Pro | $30.00 | $60.00 |
Source: CloudZero analysis
Example cost calculation:
- Message: “FastAPI kya hai?” (10 input tokens)
- Response: 200 tokens output
- Using GPT-4o-mini: ~(10×0.15 + 200×0.60) = $0.00012 per request
- 10,000 requests → only ~$1.20!
Model selection strategy:
- Simple Q&A →
gpt-4o-mini(cheap & fast) - Complex reasoning →
gpt-4o - Hardest tasks, large context →
gpt-5.5
8.2 Prompt Caching – 50% Discount
OpenAI automatically caches prompt prefixes longer than 1024 tokens. When same prefix repeats, you get 50% off input token cost!
How to structure your prompts to benefit:
# GOOD: System prompt repeated across requests
messages = [
    {"role": "system", "content": LONG_SYSTEM_PROMPT},  # Cached after first
    {"role": "user", "content": user_query}
]

# BAD: User-specific text at beginning
messages = [
    {"role": "system", "content": f"User ID: {user_id}..."},  # Different each time
]
8.3 Rate Limits – 429 Error Se Bachna
OpenAI enforces rate limits: RPM (requests/min) and TPM (tokens/min). Exceeding them returns 429 error.
Implement retry with exponential backoff:
from tenacity import retry, stop_after_attempt, wait_exponential

@retry(stop=stop_after_attempt(3), wait=wait_exponential(multiplier=1, min=2, max=10))
async def call_openai_with_retry(**kwargs):
    return await openai_client.chat.completions.create(**kwargs)
9. Error Handling – Production Mein Jaane Se Pehle
Comprehensive error handling makes your API production-ready.
from fastapi import HTTPException, status
from openai import APIError, RateLimitError, APIConnectionError

class ChatRequest(BaseModel):
    message: str
    model: str = "gpt-4o-mini"

@app.post("/chat/robust")
async def chat_robust(request: ChatRequest):
    try:
        response = await openai_client.chat.completions.create(
            model=request.model,
            messages=[{"role": "user", "content": request.message}],
            timeout=30.0,  # 👈 Set timeout
            max_tokens=1000
        )
        return {"reply": response.choices[0].message.content}

    except RateLimitError:
        # Rate limit hit (429)
        raise HTTPException(
            status_code=status.HTTP_429_TOO_MANY_REQUESTS,
            detail="Too many requests. Please try again later."
        )
    except APIConnectionError:
        # Network issues
        raise HTTPException(
            status_code=status.HTTP_503_SERVICE_UNAVAILABLE,
            detail="OpenAI API is temporarily unavailable. Please try again."
        )
    except APIError as e:
        # Other OpenAI errors (403, 400, etc.)
        raise HTTPException(
            status_code=status.HTTP_502_BAD_GATEWAY,
            detail=f"OpenAI API error: {str(e)}"
        )
    except Exception as e:
        # Generic fallback
        raise HTTPException(
            status_code=status.HTTP_500_INTERNAL_SERVER_ERROR,
            detail="An unexpected error occurred."
        )
Personal Mistake: Production mein error handling ke bina API deploy kar di thi. Ek din OpenAI API down hui toh users ko cryptic JSON error mila. Ab sab kuch handle karta hoon!
10. Real Project – Complete Chatbot API with Memory + Streaming
Ab sab kuch combine karke complete chatbot API banate hain.<details> <summary>📁 Full project code – click to expand</summary>
Project structure:
chatbot_api/
├── app/
│   ├── __init__.py
│   ├── main.py
│   ├── config.py
│   ├── openai_client.py
│   ├── chat_memory.py
│   └── models.py
├── .env
└── requirements.txtapp/models.py:
from pydantic import BaseModel
from typing import Optional, List

class ChatRequest(BaseModel):
    session_id: str
    message: str
    system_prompt: Optional[str] = "You are a helpful assistant who speaks Hinglish."
    model: str = "gpt-4o-mini"

class ChatResponse(BaseModel):
    reply: str
    model_used: str
    usage: dict
app/main.py (full):
from fastapi import FastAPI, HTTPException
from fastapi.responses import StreamingResponse
from .models import ChatRequest, ChatResponse
from .openai_client import openai_client
from .chat_memory import get_conversation, add_to_conversation
import json

app = FastAPI(title="Hinglish AI Chatbot")

@app.post("/chat", response_model=ChatResponse)
async def chat(request: ChatRequest):
    try:
        messages = []
        if request.system_prompt:
            messages.append({"role": "system", "content": request.system_prompt})

        # Add history
        history = get_conversation(request.session_id)
        messages.extend(history)
        messages.append({"role": "user", "content": request.message})

        response = await openai_client.chat.completions.create(
            model=request.model,
            messages=messages,
            temperature=0.7,
            max_tokens=500
        )

        reply = response.choices[0].message.content
        add_to_conversation(request.session_id, "user", request.message)
        add_to_conversation(request.session_id, "assistant", reply)

        return ChatResponse(
            reply=reply,
            model_used=response.model,
            usage=response.usage.model_dump()
        )
    except Exception as e:
        raise HTTPException(status_code=500, detail=str(e))

@app.post("/chat/stream")
async def chat_stream(request: ChatRequest):
    messages = []
    if request.system_prompt:
        messages.append({"role": "system", "content": request.system_prompt})
    history = get_conversation(request.session_id)
    messages.extend(history)
    messages.append({"role": "user", "content": request.message})

    async def generate():
        try:
            stream = await openai_client.chat.completions.create(
                model=request.model,
                messages=messages,
                temperature=0.7,
                max_tokens=500,
                stream=True
            )
            async for chunk in stream:
                if chunk.choices[0].delta.content:
                    yield f"data: {json.dumps({'token': chunk.choices[0].delta.content})}\n\n"
            yield f"data: {json.dumps({'done': True})}\n\n"
        except Exception as e:
            yield f"data: {json.dumps({'error': str(e)})}\n\n"

    return StreamingResponse(generate(), media_type="text/event-stream")

@app.delete("/chat/{session_id}")
async def clear_history(session_id: str):
    from .chat_memory import session_memory
    session_memory.pop(session_id, None)
    return {"message": "Conversation history cleared"}
11. Common Mistakes (aur Unka Solution!)
| Mistake | Why? | Solution |
|---|---|---|
| API key hardcoded in code | Key exposed in git | Use .env + python-dotenv |
| No timeout on OpenAI calls | API can hang indefinitely | Set timeout=30 in create() |
Forgetting await with AsyncOpenAI | Returns coroutine, not response | Always use await |
| Not handling token limits | Context window exceed kar jayega | Truncate history or limit max_tokens |
| Too long conversation history | Tokens cost skyrocket | Keep last 5-10 messages only |
| Production without retry logic | 429 errors break UX | Implement tenacity retries |
| Not monitoring token usage | Bill shock | Log usage, set budget alerts |
| Blocking code inside async | Event loop blocks | Use await openai_client or asyncio.to_thread |
Personal Mistake: Maine ek baar conversation history unlimited rakhi – ek user 2 ghante chat kiya toh context 8,000+ tokens ho gaye. Uske baad bill bohut zyada aaya! Ab har conversation mein sirf last 10 messages store karta hoon.
12. Best Practices – Production Ready Code
✅ Use AsyncOpenAI, not OpenAI – FastAPI async ke saath better performance
✅ Reuse client instance – Don’t create new client per request
✅ Set timeout for all API calls
response = await client.chat.completions.create(..., timeout=30.0)✅ Implement rate limiting – Protect your API from abuse
✅ Use gpt-4o-mini by default – Cheaper, good enough for most tasks
✅ Implement prompt caching – System prompt ko consistent rakho to save cost
✅ Log token usage per user – Identify heavy users, optimize accordingly
✅ Use environment-specific configs – Different API keys for dev/prod
✅ Add response_model validation – Always use Pydantic response models
✅ Monitor costs – Set monthly budget alerts on OpenAI dashboard
13. Resources – Cheat Sheet + Practice Prompts
Cheat Sheet (Copy-Paste Ready)
# ---------- CLIENT SETUP ----------
from openai import AsyncOpenAI
client = AsyncOpenAI(api_key=os.getenv("OPENAI_API_KEY"))

# ---------- BASIC CHAT ----------
response = await client.chat.completions.create(
    model="gpt-4o-mini",
    messages=[{"role": "user", "content": "Hello"}],
    temperature=0.7,
    max_tokens=500
)

# ---------- STREAMING ----------
stream = await client.chat.completions.create(
    model="gpt-4o-mini",
    messages=messages,
    stream=True
)
async for chunk in stream:
    if chunk.choices[0].delta.content:
        print(chunk.choices[0].delta.content, end="")

# ---------- SYSTEM PROMPT ----------
messages = [
    {"role": "system", "content": "You are a helpful assistant who speaks Hinglish."},
    {"role": "user", "content": "Namaste! Kaise ho?"}
]

# ---------- STRUCTURED OUTPUT ----------
from pydantic import BaseModel
class Analysis(BaseModel):
    sentiment: str
    score: float

response = await client.beta.chat.completions.parse(
    model="gpt-4o-mini",
    messages=messages,
    response_format=Analysis
)
result = response.choices[0].message.parsed
Practice Prompts
- Beginner: Simple
/chatendpoint banao bina memory ke. Jitendra bhai se recommendation maango. - Intermediate: Streaming endpoint implement karo. Kaam karna chahiye token-by-token aane lagein.
- Advanced: Pydantic structured output ka use karke ek email draft generator banao. JSON output format mein
subject,body,recipient_suggestionhona chahiye.
14. FAQ
Q1: OpenAI API key kaise secure rakhein?
.env file mein rakho, .gitignore mein daalo. Production mein environment variables ya secret manager (AWS Secrets, Azure Key Vault) use karo.
Q2: Streaming aur normal response mein performance difference kya hai?
Streaming gives better perceived performance – first token in <100ms vs waiting for full response (1-3 seconds). Streaming also reduces timeouts.
Q3: Conversation history mein kitne messages store karne chahiye?
Typically last 5-10 messages enough hai. Zyada messages token limit exceed kar sakte hain (GPT-4o-mini has ~16K token context).
Q4: Kya multiple models support kar sakte hain (GPT-5.5 fallback)?
Haan. Use router logic: try primary model, if fails (token limit or timeout), fallback to cheaper/faster model.
Q5: Free tier mein OpenAI API use kar sakte hain?
OpenAI initially gives some free credits. After that, pay-as-you-go. GPT-4o-mini is very affordable (~$0.15 per million input tokens).
Q6: API key mein sensitive data access? Use koi visible ho sakta hai?
API key ka access sirf tumhare paas hai. Token payload mein user-specific data mat daalo (kyunki token decode ho sakta hai). OpenAI logs requests for monitoring, so avoid sending extremely sensitive personal info.
Q7: Rate limiting handle kaise karein?
Implement exponential backoff with retries. Use tenacity library or custom retry logic.
Q8: Streaming mein client disconnect handle kaise karein?
Use try-except around generator. When client disconnects, stop generating and cleanup.
Q9: Kya mere paas billing threshold set kar sakta hoon?
Haan! OpenAI dashboard mein “Usage limits” section mein monthly spending limit set kar sakte ho.
Q10: Different models use karne se kya antar hai?
gpt-4o-mini = cheapest, fastest for simple tasks. gpt-4o = smarter for medium complexity. gpt-5.5 = most intelligent for complex reasoning and large context (>1M tokens). Pick based on task difficulty.
15. Conclusion
Bahut badhiya! Aapne aaj seekh liya:
✅ FastAPI OpenAI integration Hindi mein – full setup
✅ Basic chat endpoints + streaming responses (real-time SSE)
✅ Conversation history with session-based memory
✅ Pydantic structured outputs – clean JSON responses
✅ Cost management – tokens, pricing, caching, rate limits
✅ Production-ready error handling
✅ Complete project example with memory + streaming
OpenAI + FastAPI = powerful AI applications in minutes! Ab aap apna custom AI chatbot bana sakte ho with memory, streaming, and structured outputs.
Aapki challenge: Upar diye practice prompts mein se koi ek implement karo. Apna code comment mein share karo – main review karunga.
Next topic kya chahiye?
- FastAPI + Vector Database (RAG chatbot)?
- FastAPI WebSockets (Real-time AI chat)?
- Fine-tuning OpenAI models for your domain?
Comment mein batao!
The Easy Master ke saath AI coding seekhte raho. Happy building! 🤖🚀
16. Deployment – Free Platforms Pe Kaise Daalein
Apni FastAPI + OpenAI chatbot ko publicly deploy karne ke liye ye free platforms use kar sakte ho:
1. Render (Free tier) – Up to 750 instance hours/month
- Connect your GitHub repo
- Set environment variables (OPENAI_API_KEY)
- Build command:
pip install -r requirements.txt - Start command:
uvicorn app.main:app --host 0.0.0.0 --port $PORT
2. Railway (Free tier) – Works well with FastAPI
railway loginthenrailway up- Add OPENAI_API_KEY as secret variable
- Auto-scaling support
3. Hugging Face Spaces – Free with limitations
- Create new Space → Docker or Gradio SDK
- Add secrets in Settings
⚠️ Note: Free tiers have cold starts (first request after inactivity takes 5-10 seconds). Totally normal behaviour.
Resources
- OpenAI Python SDK Official Docs
- OpenAI API Changelog
- OpenAI Structured Outputs Guide
- FastAPI OpenAI Compatibility Router
Additional Resources
- MongoDB Setup – CRUD Operations समझे (Beginner Guide) 2026
- MongoDB Compass से GUI Database Manage करने का आसान तरीका | Beginner Tutorial 2026
- Node.js MongoDB Connection – Mongoose Setup समझे 2026
- MongoDB Data Modeling – Embedded Documents vs References 2026
- MongoDB Indexing – Query Speed बढ़ने करने का आसान तरीका
- MongoDB Aggregation Pipeline – Stages समझे | Practical Examples
- Express MongoDB CRUD – Complete REST API Example
- Mongoose ODM – Schema, Model, and Validation समझे 2026
- MongoDB Atlas – Cloud Database Free में Deploy करें 2026
- JWT Authentication MongoDB – User Login System कैसे बनाएं 2026
- Next.js App Router – Pages Router से क्या बदला? Complete Guide 2026
- Next.js Server Components – ‘use client’ कब और कहां Use करें
- Next.js Routing – Layouts, Dynamic Routes and Nested Routes 2026
- Next.js 16 New Features – Turbopack, Cache Components and proxy.ts
- Next.js Partial Prerendering – Static and Dynamic Content साथ में
- Next.js Authentication – JWT Session Management (App Router) 2026
- Next.js SEO – Metadata API and Image Optimization समझे 2026
- Next.js TypeScript – Full-Stack Type-Safe App कैसे बनाएं
- FastAPI Kya Hai? FastAPI Python Setup Aur Pehla API Hindi 2026
- FastAPI Path Parameters Hindi – शून्य से हीरो तक गाइड 2026
- Pydantic v2 Tutorial Hindi – Data Validation Master 2026
- FastAPI dependency injection Hindi – Code Reuse Ka Magic
- FastAPI Async Await Hindi – Non-Blocking Code 2026
- FastAPI PostgreSQL SQLModel Hindi – Async Guide 2026
- FastAPI JWT Authentication Hindi – Secure API Login
Views: 529