नमस्ते दोस्तों!
स्वागत है The Easy Master पर!
आपने Kubernetes architecture समझ लिया – Pods, Nodes, Cluster, Control Plane, सब कुछ। अब एक सवाल – “Practice कहाँ करें?” Cloud par cluster लेना expensive है। Mini PC cluster खरीदना possible नहीं। तो फिर कैसे सीखें?
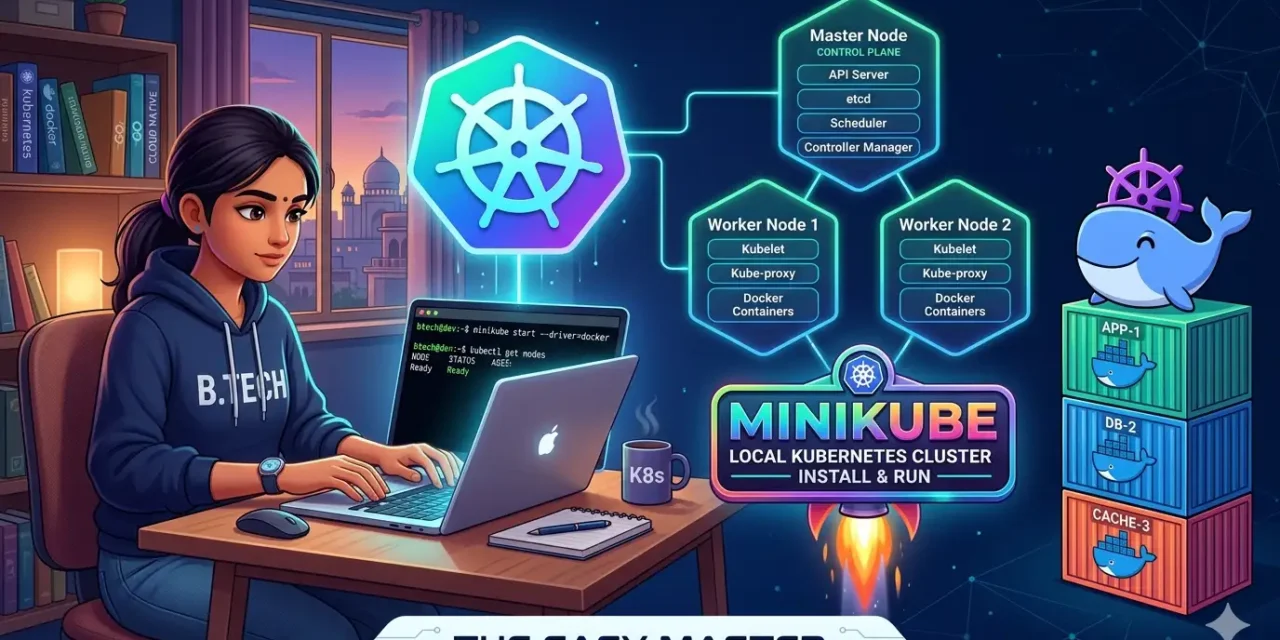
Minikube से। Minikube Kubernetes का एक single-node version है जो आपके local laptop पर VM या container में चलता है। यह production cluster जैसा ही experience देता है – बिलकुल free में।
Jab maine pehli baar Kubernetes सीखने की कोशिश की, तो mujhe भी same problem thi। Mera laptop 8GB RAM wala tha, cloud cluster expensive था। Tab kisi friend ne bataya – “Minikube use kar, apne laptop par hi cluster bana.” Maine install kiya, ek simple Nginx app deploy ki, aur Kubernetes ka magic समझ में आ गया।
इस Minikube tutorial Hindi में मैं आपको step-by-step सिखाऊंगा:
✅ Minikube kya hai aur kyun use karein (Kind vs K3d vs Docker Desktop comparison ke saath)
✅ Prerequisites – hardware requirements aur software setup
✅ Installation – Windows, macOS, Linux पर step-by-step
✅ Minikube drivers – Docker, Hyper-V, VirtualBox, Hyperkit (kaunsa kab use karein)
✅ Cluster start aur verify – minikube start से लेकर kubectl get nodes तक
✅ Addons enable karna – Dashboard, Metrics Server, Ingress Controller
✅ Pehla app deploy karna – Nginx Deployment + Service
✅ Cluster manage karna – stop, start, delete, status
✅ Minikube CLI commands complete guide
✅ Troubleshooting common errors – driver issues, insufficient resources, etc.
Chaliye local Kubernetes cluster banana shuru karte hain! ☸️🐳
Table of Contents
1. Minikube Kya Hai? – Local Kubernetes Ka Ghar
Minikube एक tool hai jo local machine पर एक single-node Kubernetes cluster run karta है। यह काम करता है VM (virtual machine) या container create करके जिसमें Kubernetes चलता है।
मान लो आपने एक नया खेल सीखना है – video game। बिना practice के सीधे tournament में मत जाओ। पहले अपने घर पर practice karo – training mode on karo, controls samjho, mistakes karo, aur phir master’s league mein jao। Minikube exactly यही है – आपका local practice ground for Kubernetes। Minikube provisions and runs a local single-node Kubernetes cluster suitable for development, learning, and CI.
Minikube is fully API-compatible with real Kubernetes, meaning जो कुछ भी आप Minikube पर सीखोगे, वो production cluster पर same काम करेगा। Minikube एक local सरकारी कुश्ती अखाड़ा है – वही नियम, वही ring, वही referee। Only difference यह है कि audience sirf aap ho।
2. Kind vs K3d vs Docker Desktop vs Minikube – कौन सा Choose करें?
Local Kubernetes development के लिए 4 main tools हैं। Let’s compare them:
| Tool | How it works | Startup Time | Memory Usage | Best for |
|---|---|---|---|---|
| Minikube | VM या container में full K8s node | 2-5 minutes | 2-8 GB | Beginners, CKA prep, production-faithful testing |
| Kind | Kubernetes nodes as Docker containers | 30-60 seconds | ~1 GB | CI/CD testing, automated pipelines |
| K3d | K3s (lightweight K8s) in Docker | 15-30 seconds | ~500 MB | Performance, multi-node simulation |
| Docker Desktop | Built-in K8s (bundled) | 1-2 minutes | 1-2 GB | Docker users, quick testing |
Why Minikube for beginners?
- 100% K8s conformance – Completely production faithful, same as actual cloud cluster
- 30+ built-in addons – Dashboard, metrics-server, ingress, registry, all one command se enable
- Multi-driver support – Docker, VirtualBox, Hyper-V, Hyperkit, Podman – jo bhi aapke system par available ho
- Official Kubernetes project – CNCF incubation project; trusted by industry
- Cross-platform – Linux, macOS, Windows – teeno par same experience
Minikube suits beginners with its simple interface and provides maximum compatibility with a production cluster. If you are preparing for CKA certification, Minikube’s built-in add-ons and 100% K8s conformance make it the best choice.
3. Prerequisites – Install Karne Se Pehle Check Karein
Installation start करने से पहले ensure करें आपका system नीचे दिए minimum requirements meet करता है:
Hardware Requirements
| Component | Minikube Minimum | Recommended |
|---|---|---|
| CPU | 2 cores / 2 vCPU | 4 cores / 4 vCPU |
| RAM | 2 GB free (over system usage) | 4-8 GB free |
| Disk | 20 GB free space | 30+ GB free space |
| Virtualization | Enabled (BIOS) | Hardware-accelerated virtualization |
The cluster requires at least two CPUs, 2 GB of free memory, and 20 GB disk space. पर practice के लिए 4GB RAM और 2 core CPU वाला laptop भी sufficient है।
Software Prerequisites
1. Install Docker Desktop (Recommended)
For Windows and macOS, install Docker Desktop. For Linux, install Docker Engine. Docker Desktop 4.37+ or Docker Engine 26+ are recommended. Docker is required because:
- Minikube uses Docker as the default driver (most stable and convenient)
- Without Docker, Minikube will need other drivers (VirtualBox, Hyper-V, Hyperkit)
Check your Docker version:
docker --version
# Expected: Docker version 26.1.4+ or Docker Desktop 4.37+
2. Install kubectl (Optional but Recommended)
Minikube automatically configures kubectl to use the cluster, but installing kubectl separately is good practice.
kubectl version --client3. System Architecture Note
Minikube currently supports x86-64 hardware (Intel/AMD 64-bit). Arm64 support (Apple M1/M2/M3) is available only with the Docker driver.
Summary: You Need These 2 Things
- Docker Desktop (Mac/Windows) or Docker Engine (Linux)
- Minikube binary (installation next step)
That’s it. After installing these two, you’ll be ready to start your first cluster.
4. Installation – Windows, macOS, Linux
Windows (3 Easy Methods)
Method 1: Chocolatey (Recommended for simplicity)
# First install Chocolatey if not installed:
Set-ExecutionPolicy Bypass -Scope Process -Force; [System.Net.ServicePointManager]::SecurityProtocol = [System.Net.ServicePointManager]::SecurityProtocol -bor 3072; iex ((New-Object System.Net.WebClient).DownloadString('https://community.chocolatey.org/install.ps1'))

# Then install Minikube and kubectl:
choco install minikube
choco install kubernetes-cli
Chocolatey automatically adds Minikube to your PATH, and you can verify with:
minikube versionChocolatey is the recommended method for Windows.
Method 2: Winget (Official Windows Package Manager)
winget install -e --id Kubernetes.minikube
winget install -e --id Kubernetes.kubectl
Method 3: Direct download (Manual)
- Go to Minikube releases page on GitHub
- Download
minikube-windows-amd64.exe - Rename to
minikube.exeand place in a folder (e.g.,C:\minikube\) - Add that folder to system PATH (Environment Variables → Edit the system environment variables → PATH → New → Add folder path)
macOS (2 Easy Methods)
Method 1: Homebrew (Recommended)
brew install minikube
brew install kubectl
This is the simplest and most common method for macOS users.
Method 2: Direct download (Alternative)
curl -LO https://storage.googleapis.com/minikube/releases/latest/minikube-darwin-amd64
sudo install minikube-darwin-amd64 /usr/local/bin/minikube
For Apple Silicon (M1/M2/M3) Macs, download the arm64 version:
curl -LO https://storage.googleapis.com/minikube/releases/latest/minikube-darwin-arm64
sudo install minikube-darwin-arm64 /usr/local/bin/minikube
Verify installation:
minikube versionLinux (Ubuntu/Debian based)
# Download the latest release binary
curl -LO https://storage.googleapis.com/minikube/releases/latest/minikube-linux-amd64

# Install it
sudo install minikube-linux-amd64 /usr/local/bin/minikube

# Verify
minikube version
For Linux, Minikube uses systemd to manage services automatically, and the default driver is Docker.
Verify Minikube and kubectl Installation (all OS)
Run these commands to confirm everything is ready:
# Check Minikube version
minikube version

# Check kubectl version
kubectl version --client
Both commands should display version numbers without errors。 Installation completed!
5. Minikube Drivers – Kaunsa Driver Kab Use Karein
Minikube requires a driver – a way to run the Kubernetes node (either in a VM or a container). Minikube supports multiple drivers and you can specify one with --driver flag.
Driver Comparison
| Driver | How it works | Pros | Cons |
|---|---|---|---|
| docker | Runs K8s node as a Docker container | Lightweight, fast, cross-platform, simplest | Requires Docker |
| hyperkit | Lightweight VM on macOS Intel | Built-in macOS, fast | Intel only, deprecated (modern macOS → docker driver) |
| hyperv | Hyper-V VM on Windows | Built-in Windows, stable | Windows Pro/Enterprise only, requires enabling Hyper-V |
| virtualbox | VirtualBox VM | Cross-platform, customizable | Slower startup, requires installing VirtualBox |
| podman | Runs K8s node as Podman container | Docker alternative | Less common, requires Podman |
Driver Selection Guide
Recommendation: Use docker driver for ALL users (easiest and fastest).
The default driver option is fine for most users. Docker driver is available on Windows, macOS, and Linux, and it is the simplest to get started with.
To use docker driver explicitly:
minikube start --driver=dockerFor specific cases:
- Windows Home Edition – Docker driver (requires Docker Desktop) or VirtualBox
- macOS (Intel) – docker driver (simpler) or hyperkit (if Docker unavailable)
- macOS Apple Silicon (M1/M2/M3) – docker driver (only supported option)
- Linux – docker driver (default, works perfectly)
- Windows Pro with Hyper-V – hyperv driver (enterprise environments)
💡 Personal Experience: I started with VirtualBox on Windows – slow startup, sometimes crashes. Switched to Docker driver, and everything became smooth.
minikube startreduced from 3 minutes to 45 seconds. Always use--driver=dockerwhenever possible.
Check current driver:
minikube config get driverChange driver permanently (optional):
minikube config set driver docker6. Hands-On #1 – Pehla Cluster Start Karein
Now comes the exciting part – starting your first Kubernetes cluster!
Step 1: Start the Cluster
minikube start --driver=docker --memory=4096 --cpus=2What this command does:
--driver=docker– use Docker driver (lightweight, fast)--memory=4096– allocate 4 GB RAM to cluster--cpus=2– allocate 2 CPU cores to cluster
If you omit --driver, Minikube will automatically pick a default driver based on your system.
Expected output:
minikube v1.38.1 on Darwin 14.5
✨ Using the docker driver based on user configuration
👍 Starting control plane node minikube in cluster minikube
🚜 Pulling base image ...
🔥 Creating docker container (CPUs=2, Memory=4096MB) ...
🐳 Preparing Kubernetes v1.31.0 on Docker 27.2.0 ...
🔗 Configuring bridge CNI (Container Networking Interface) ...
🔎 Verifying Kubernetes components...
🌟 Enabled addons: default-storageclass, storage-provisioner
🏄 Done! kubectl is now configured to use "minikube" cluster and "default" namespace
The first-time start will download necessary images and might take 2-3 minutes. Subsequent starts will be faster.
Step 2: Verify Cluster Status
minikube statusExpected output:
minikube
type: Control Plane
host: Running
kubelet: Running
apiserver: Running
kubeconfig: Configured
Step 3: Check Cluster Info with kubectl
kubectl cluster-infoExpected output:
Kubernetes control plane is running at https://127.0.0.1:55000
CoreDNS is running at https://127.0.0.1:55000/api/v1/namespaces/kube-system/services/kube-dns:dns/proxy
Step 4: List Nodes
kubectl get nodesExpected output:
NAME       STATUS   ROLES           AGE   VERSION
minikube   Ready    control-plane   1m    v1.31.0
Congratulations! You are now running Kubernetes on your local machine! 🎉
Step 5: Optional Flags for cluster configuration
| Flag | Purpose | Example |
|---|---|---|
--kubernetes-version=v1.31.0 | Specific K8s version | --kubernetes-version=v1.30.0 |
--cpus=4 | Number of CPUs | --cpus=4 |
--memory=8192 | RAM in MB | --memory=8192 |
--disk-size=30g | Disk size | --disk-size=30g |
--nodes=3 | Multi-node cluster | --nodes=3 (experimental) |
--addons=ingress | Enable addons at start | --addons=ingress |
Default cluster uses latest stable Kubernetes version with 2 CPUs and 2 GB RAM. For production-like testing, increase resources accordingly.
7. Minikube CLI Commands – Har Command Samjhein
Minikube has a comprehensive command-line interface for cluster management. Here are the most important commands:
| Command | What it does | Example |
|---|---|---|
minikube start | Start the cluster | minikube start --driver=docker |
minikube stop | Stop cluster (preserves state) | minikube stop |
minikube start after stop | Restart cluster | Keeps all data and configurations |
minikube delete | Delete cluster (destroy all resources) | minikube delete |
minikube delete --all | Delete all clusters and profiles | minikube delete --all |
minikube status | Show cluster status | Shows host, kubelet, apiserver status |
minikube dashboard | Launch K8s web UI | Opens dashboard in default browser |
minikube ssh | SSH into cluster node | minikube ssh (then run Linux commands) |
minikube ip | Get cluster IP address | Useful for service access |
minikube service <name> | Get service URL | minikube service myapp --url |
minikube addons list | List all available addons | Shows which addons enabled/disabled |
minikube addons enable <name> | Enable an addon | minikube addons enable ingress |
minikube addons disable <name> | Disable an addon | minikube addons disable ingress |
minikube docker-env | Configure docker to use Minikube’s daemon | eval $(minikube docker-env) |
minikube cache | Manage image cache | Useful for air-gapped environments |
minikube profile | Manage cluster profiles | minikube profile list, minikube profile my-cluster |
Key Commands Explained
minikube stop vs minikube delete:
stop: Stops the cluster but retains its state. You can later restart withminikube start. Good for pausing work (saves battery).delete: Removes all cluster resources and VMs, releasing all VM and disk resources. Use when you want a clean slate.
minikube dashboard: This launches the Kubernetes web-based dashboard (covered in next section). It automatically ports forward to your local machine.
minikube addons:
Minikube ships with 30+ optional addons that can be enabled with minikube addons enable. Features like ingress, metrics-server, dashboard, registry are available out of the box.
💡 Note: Minikube can run multiple clusters using
--profileflag. For example:minikube start -p cluster2creates a separate named cluster.
8. Addons – Dashboard, Metrics Server, Ingress Kaise Enable Karein
Minikube comes with many built-in addons (extensions) that add Kubernetes functionality. Addons are enabled by default for some basic features, but others require explicit enabling.
8.1 List All Available Addons
minikube addons listOutput will show addons and their status:
| ADDON NAME                | PROFILE   | STATUS     |
| dashboard                 | minikube  | disabled   |
| default-storageclass      | minikube  | enabled ✅ |
| ingress                   | minikube  | disabled   |
| metrics-server            | minikube  | disabled   |
| registry                  | minikube  | disabled   |
| storage-provisioner       | minikube  | enabled ✅ |
8.2 Enable Dashboard (Web UI)
Kubernetes Dashboard is a web-based UI for managing your cluster.
minikube addons enable dashboardAfter enabling, launch dashboard:
minikube dashboardThis automatically creates a proxy and opens the dashboard in your default browser. You can also enable metrics-server for cluster metrics:
minikube addons enable metrics-serverMetrics-server allows viewing CPU and memory usage of pods using kubectl top pods.
8.3 Enable Ingress Controller
Ingress allows HTTP/HTTPS routing to services in your cluster (like API gateway).
minikube addons enable ingressVerify ingress controller is running:
kubectl get pods -n ingress-nginxExpected output shows running ingress controller pods.
8.4 Enable Registry (Local Docker Registry)
minikube addons enable registryThis creates a local Docker registry that runs inside your cluster. For development, this is useful for pushing and pulling images without an external registry.
8.5 Disable an Addon
minikube addons disable <addon-name>
# Example:
minikube addons disable dashboard
8.6 Summary of Important Addons
| Addon | Purpose | Command |
|---|---|---|
| dashboard | Web UI for K8s cluster | minikube addons enable dashboard |
| metrics-server | Cluster metrics (CPU/memory) | minikube addons enable metrics-server |
| ingress | HTTP routing to services | minikube addons enable ingress |
| registry | Local container registry | minikube addons enable registry |
| storage-provisioner | Dynamic volume provisioning (enabled by default) | Automatically enabled |
| default-storageclass | Default StorageClass (enabled by default) | Automatically enabled |
9. Hands-On #2 – Pehla App Deploy Karein (Nginx Example)
Now that your cluster is up and running, let’s deploy your first application! We’ll deploy Nginx web server as a Kubernetes Deployment and expose it as a Service.
Step 1: Create a Deployment
kubectl create deployment nginx-deployment --image=nginxWhat happened?
- Kubernetes created a Deployment named
nginx-deployment - The Deployment created a Pod running Nginx container
- The Pod pulls the
nginximage from Docker Hub
Step 2: Check Deployment Status
kubectl get deploymentsExpected output:
NAME               READY   UP-TO-DATE   AVAILABLE   AGE
nginx-deployment   1/1     1            1           10s
Step 3: Check Pods
kubectl get podsExpected output:
NAME                                READY   STATUS    RESTARTS   AGE
nginx-deployment-7c9796fd6d-xyz12   1/1     Running   0          15s
Step 4: Expose the Pod as a Service
Now make the Nginx web server accessible outside the cluster:
kubectl expose deployment nginx-deployment --type=NodePort --port=80What this does:
- Creates a Service that forwards traffic to the Nginx Pod
--type=NodePortexposes the service on a port on each node (30000-32767 range)--port=80specifies the container port (nginx listens on 80)
Step 5: Get Service URL
minikube service nginx-deployment --urlYou’ll get an output like:
text
http://192.168.49.2:31234Step 6: Access the Application
Option A: Open the service directly in browser:
minikube service nginx-deploymentThis automatically opens the Nginx welcome page in your default browser.
Option B: Use the URL from above:
curl http://192.168.49.2:31234You should see the standard Nginx welcome HTML!
Step 7: Verify Service is Running
kubectl get servicesExpected output:
NAME               TYPE        CLUSTER-IP      EXTERNAL-IP   PORT(S)        AGE
kubernetes         ClusterIP   10.96.0.1       <none>        443/TCP        5m
nginx-deployment   NodePort    10.103.50.124   <none>        80:31234/TCP   30s
Step 8: Scale the Deployment (Optional)
Increase number of replicas (nginx pods) to 3:
kubectl scale deployment nginx-deployment --replicas=3Check pods:
kubectl get podsYou’ll see 3 nginx pods running now. The Service automatically load-balances traffic among them.
Step 9: Clean Up (when done)
Delete the resources we created:
kubectl delete service nginx-deployment
kubectl delete deployment nginx-deployment
Verify they are gone:
kubectl get pods
kubectl get services
Understanding Kubernetes Concepts
| Concept | What we did |
|---|---|
| Pod | A single Nginx container running inside a Pod |
| Deployment | Managed the Pod lifecycle, ensured 1 replica running |
| Service | Exposed the Nginx Pod to external traffic via NodePort |
| NodePort | Created a static port (31234) on the Minikube node to access the service |
In 30 minutes, you installed Minikube, started a cluster, deployed your first application, exposed it as a service, scaled it, and accessed it – all using kubectl commands!
10. Cluster Management – Stop, Start, Delete, Status, Pause
Managing your Minikube cluster is straightforward.
10.1 Stop the Cluster
When you’re done working and want to save system resources:
minikube stopThis shuts down the cluster gracefully but keeps all cluster data for future use. All Pods, Deployments, Services, and configurations are preserved.
10.2 Start the Cluster Again (After Stop)
minikube startThis restarts the cluster with the same configuration as before. All your workloads (Pods, Deployments) will be restored automatically.
10.3 Check Cluster Status
minikube statusOutput shows each component’s status.
10.4 Delete the Cluster (Permanent)
When you want to completely remove the cluster and start fresh:
minikube deleteThis removes all VMs, containers, and associated resources created by Minikube. This action is irreversible – all workloads and configurations will be permanently lost.
10.5 Delete All Clusters and Profiles
If you have multiple profiles/clusters:
minikube delete --allDeletes all clusters managed by Minikube and removes all profiles.
10.6 Pause the Cluster
To temporarily pause all cluster processes without stopping completely:
minikube pauseThis freezes the cluster state. Resume with:
minikube unpause10.7 Summary
| Action | Command | Data Persistence |
|---|---|---|
| Stop (temporary) | minikube stop | ✅ Preserves all data |
| Restart after stop | minikube start | ✅ Restores previous state |
| Pause (freeze) | minikube pause | ✅ Preserves state |
| Resume | minikube unpause | ✅ Continues where paused |
| Delete (permanent) | minikube delete | ❌ All data lost |
| Delete all clusters | minikube delete --all | ❌ All profiles lost |
11. Minikube vs Real Kubernetes – Differences
While Minikube is great for learning and development, it is NOT exactly the same as a production Kubernetes cluster. Here are the key differences:
| Aspect | Minikube | Real Production K8s (EKS/GKE/AKS) |
|---|---|---|
| Nodes | Single node (single-node cluster) | Multiple nodes (3, 10, 100+ nodes) |
| High Availability | No (single control plane) | Yes (multiple control plane nodes) |
| Cloud Provider Integration | No (simulated) | Yes (load balancer, storage, etc.) |
| Persistent Volumes | hostPath or local storage | Cloud storage (EBS, Persistent Disk, Azure Disk) |
| LoadBalancer Service | Uses minikube tunnel (simulated) | Real cloud load balancer |
| Scaling | Manual (kubectl scale) | Manual + Auto-scaling (Horizontal Pod Autoscaler) |
| Network Policies | Supported (with CNI) | Fully supported with proper CNI |
| Ingress Controller | minikube addons enable ingress | Separate controller deployment |
What Minikube is Good For:
- ✅ Learning Kubernetes concepts (Pods, Deployments, Services)
- ✅ CKA/CKAD exam preparation (100% K8s conformance)
- ✅ Development and testing (fast iteration)
- ✅ Local debugging of YAML manifests
- ✅ Testing multi-container applications locally
What Minikube is NOT Good For:
- ❌ High-availability testing (single control plane)
- ❌ Production workloads (use real clusters)
- ❌ Performance benchmarking (minimal resources)
- ❌ Testing cloud-specific features (load balancer, cloud storage)
Minikube offers maximum compatibility with a production cluster, but for true production-level testing, consider Kind, K3s, or cloud-based clusters.
12. Troubleshooting Common Errors (aur Unka Solution!)
Error 1: “Unable to pick a default driver” or “DRV_NOT_DETECTED”
Why? Minikube cannot find a suitable driver (virtualization software).
Solution:
- Ensure Docker Desktop is installed and running
- Or install VirtualBox and set driver:
minikube start --driver=virtualbox - Or on Linux: Ensure Docker engine is installed and user has permissions
Error 2: “Hyperkit driver not found” on macOS
Why? Hyperkit is deprecated and not available on newer macOS versions.
Solution:
minikube start --driver=dockerDocker driver works on macOS Intel and Apple Silicon (M1/M2/M3).
Error 3: “Not enough memory or CPU” on Windows
Why? Default resources may be insufficient.
Solution:
minikube start --cpus=2 --memory=4096Or increase further: --cpus=4 --memory=8192
Error 4: Cluster won’t start – stale cache
Why? Old cluster configuration is stuck.
Solution:
minikube delete
minikube start
Error 5: “Error: unknown flag: –driver”
Why? Old Minikube version.
Solution:
minikube version
# If older than 1.30, update Minikube
brew upgrade minikube  # macOS
choco upgrade minikube # Windows
Error 6: “The ‘docker’ driver requires Docker Desktop”
Why? Docker not installed or not running.
Solution:
- Install Docker Desktop from docker.com
- Ensure Docker Desktop is running (system tray icon green)
- Verify with:
docker --version
Error 7: Virtualization not enabled (Windows)
Why? Hardware virtualization disabled in BIOS.
Solution:
- Restart computer and enter BIOS/UEFI
- Enable “Intel VT-x” or “AMD-V” or “Virtualization Technology”
- Save and exit
Error 8: kubectl commands not working after cluster stop
Why? minikube stop stops the API server.
Solution:
minikube startAfter cluster starts, kubectl commands will work again.
💡 Pro Tip: When in doubt, run
minikube deletefollowed byminikube start --driver=docker– this solves 90% of cluster startup issues. Then verify withminikube statusandkubectl get nodes.
13. Resources – Cheat Sheet & Practice Prompts
Minikube Commands Cheat Sheet
| Task | Command |
|---|---|
| Start cluster (basic) | minikube start |
| Start with Docker driver | minikube start --driver=docker |
| Start with custom resources | minikube start --cpus=4 --memory=8192 --disk-size=30g |
| Stop cluster | minikube stop |
| Delete cluster (permanent) | minikube delete |
| Check cluster status | minikube status |
| Launch dashboard | minikube dashboard |
| Get cluster IP | minikube ip |
| SSH into cluster node | minikube ssh |
| List all addons | minikube addons list |
| Enable dashboard | minikube addons enable dashboard |
| Enable ingress | minikube addons enable ingress |
| Enable metrics-server | minikube addons enable metrics-server |
| Disable an addon | minikube addons disable <name> |
| Get service URL | minikube service <svc-name> --url |
| Open service in browser | minikube service <svc-name> |
| Configure docker-env | eval $(minikube docker-env) |
kubectl Commands Cheat Sheet
| Task | Command |
|---|---|
| List nodes | kubectl get nodes |
| List pods | kubectl get pods |
| List pods in all namespaces | kubectl get pods --all-namespaces |
| List deployments | kubectl get deployments |
| List services | kubectl get services |
| Create deployment | kubectl create deployment NAME --image=IMAGE |
| Expose deployment as service | kubectl expose deployment NAME --type=NodePort --port=80 |
| Scale replicas | kubectl scale deployment NAME --replicas=3 |
| View pod logs | kubectl logs POD_NAME |
| Delete deployment | kubectl delete deployment NAME |
| Delete service | kubectl delete service NAME |
Practice Prompts
Beginner:
- Minikube install karo aur cluster start karo with
--driver=docker।minikube statusaurkubectl get nodescommands चलाकर verify karo। Dashboard enable karo aurminikube dashboardcommand से launch karo।
Intermediate:
- Nginx deployment create karo with 2 replicas। Service expose karo as NodePort। Access the app using
minikube service nginx। Scaling test karo – from 2 replicas to 5 replicas।
Advanced:
- Custom YAML manifest banao for a simple FastAPI application। Deploy it using
kubectl apply -f app.yaml। Ingress addon enable karo aur Ingress rule banake multiple services को एक IP par expose karo। Metrics-server enable karo aurkubectl top podsचलाकर resource usage देखो।
14. FAQ
Q1: Minikube aur Kind mein kya antar hai?
Kind runs Kubernetes nodes as Docker containers (faster startup, ~30 seconds), while Minikube defaults to a VM (~60-120 seconds startup). For learning purposes, Minikube offers 100% K8s conformance and built-in addons. Kind is preferred for CI/CD automation.
Q2: Kya Minikube main production Kubernetes use kar sakta hoon?
No – Minikube is designed for development and learning only. Production clusters need multiple nodes, high availability, proper networking, cloud integrations, and security features that Minikube does not provide.
Q3: Minikube cluster start karne mein kitna time lagta hai?
First start: 2-5 minutes (downloads images). Subsequent starts: 60-120 seconds (with saved images and cached preloads).
Q4: Dashboard, metrics-server, aur ingress addons kyun enable karein?
- Dashboard: Visual web UI for cluster management and troubleshooting
- Metrics-server: Required for
kubectl top podsto view CPU/memory usage metrics - Ingress: HTTP/HTTPS routing for multiple services under same IP (API gateway functionality)
Q5: “No resources found” error kaise theek karein?
Verify your namespace context with kubectl config get-contexts and ensure kubectl get pods not called in wrong namespace. Check pod status with kubectl get pods --all-namespaces.
Q6: Mac Apple Silicon (M1/M2/M3) par Minikube kaise chalayein?
Use the Docker driver! Hyperkit and VirtualBox don’t work on Apple Silicon. Command: minikube start --driver=docker. Docker Desktop for Apple Silicon must be installed.
Q7: Minikube cluster main multiple nodes kaise create karein?
Minikube supports experimental multi-node clusters:
minikube start --nodes 3 --driver=dockerBut this is for testing only – production-like multi-node requires Kind or real cloud clusters.
Q8: Minikube stop aur delete mein kya antar hai?
Stop: Pauses cluster but retains all data (Pods, Deployments, Services). Delete: Completely removes cluster, all data is lost irreversibly. Use stop for temporary pauses, delete when starting fresh.
Q9: Minikube cluster main local Docker images kaise use karein?
Three methods: 1) eval $(minikube docker-env) then docker build -t myapp . 2) minikube image load myapp:latest 3) minikube addons enable registry and push to local registry。
Q10: Kya Minikube Windows WSL2 (Windows Subsystem for Linux) par chal sakta hai?
Yes, but Docker driver requires Docker Desktop with WSL2 backend. Install Docker Desktop, enable WSL2 integration, then use minikube start --driver=docker。
15. Conclusion – Ab Aapki Baari!
Bahut badhiya! Aapne aaj seekh liya:
✅ Minikube tutorial Hindi – complete hands-on guide
✅ Minikube kya hai aur local cluster kyun important hai
✅ Kind vs K3d vs Minikube – choose karna for your needs
✅ Installation – Windows, macOS, Linux par step-by-step
✅ Drivers – Docker, Hyper-V, VirtualBox – kaunsa choose karein
✅ Cluster start – minikube start से लेकर verify तक
✅ Addons – Dashboard, metrics-server, ingress enable karna
✅ First Nginx app deployed and exposed as NodePort service
✅ Cluster management – stop, start, delete, status, pause
✅ Troubleshooting common errors – solutions for each
Minikube is your local Kubernetes laboratory – experiment freely, break things, fix them, and learn. Kubernetes is becoming the de facto operating system for cloud-native applications; 82% of container users now run Kubernetes in production. This skill will help you immensely in placements and real-world projects.
Aapki challenge: Minikube install karo, cluster start karo, dashboard enable karo aur minikube dashboard launch karo। Nginx deployment create karo with NodePort service। Access the app using minikube service nginx-deployment। Apna experience comment mein share karo!
Next topic kya chahiye?
- Kubernetes Pods & Deployments in Detail?
- Kubernetes Services & Networking (ClusterIP, NodePort, LoadBalancer)?
- Deploying a Real FastAPI App on Minikube?
Comment mein batao!
The Easy Master ke saath Kubernetes seekhte raho। Happy local clustering! 🐳☸️
Resources
- Minikube Official Documentation
- kubectl Cheat Sheet – Kubernetes.io
- Docker Desktop – Official Site
- Minikube GitHub Repository
Additional Resources
- MongoDB Setup – CRUD Operations समझे (Beginner Guide) 2026
- MongoDB Compass से GUI Database Manage करने का आसान तरीका | Beginner Tutorial 2026
- Node.js MongoDB Connection – Mongoose Setup समझे 2026
- MongoDB Data Modeling – Embedded Documents vs References 2026
- MongoDB Indexing – Query Speed बढ़ने करने का आसान तरीका
- MongoDB Aggregation Pipeline – Stages समझे | Practical Examples
- Express MongoDB CRUD – Complete REST API Example
- Mongoose ODM – Schema, Model, and Validation समझे 2026
- MongoDB Atlas – Cloud Database Free में Deploy करें 2026
- JWT Authentication MongoDB – User Login System कैसे बनाएं 2026
- Next.js App Router – Pages Router से क्या बदला? Complete Guide 2026
- Next.js Server Components – ‘use client’ कब और कहां Use करें
- Next.js Routing – Layouts, Dynamic Routes and Nested Routes 2026
- Next.js 16 New Features – Turbopack, Cache Components and proxy.ts
- Next.js Partial Prerendering – Static and Dynamic Content साथ में
- Next.js Authentication – JWT Session Management (App Router) 2026
- Next.js SEO – Metadata API and Image Optimization समझे 2026
- Next.js TypeScript – Full-Stack Type-Safe App कैसे बनाएं
- FastAPI Kya Hai? FastAPI Python Setup Aur Pehla API Hindi 2026
- FastAPI Path Parameters Hindi – शून्य से हीरो तक गाइड 2026
- Pydantic v2 Tutorial Hindi – Data Validation Master 2026
- FastAPI dependency injection Hindi – Code Reuse Ka Magic
- FastAPI Async Await Hindi – Non-Blocking Code 2026
- FastAPI PostgreSQL SQLModel Hindi – Async Guide 2026
- FastAPI JWT Authentication Hindi – Secure API Login
- FastAPI OpenAI Integration Hindi – AI Chatbot API 2026
- FastAPI Multi-Agent AI Hindi – LangGraph Zero to Hero
- FastAPI Deployment Hindi – Railway Zero to Hero 2026
- Docker Introduction in Hindi? Containers vs Virtual Machines
- Docker Images and Containers Hindi – Pehla Container
- Docker Compose Tutorial Hindi – Node.js + MongoDB
- Docker Volumes Networking Hindi – Data Persist कैसे करें
- Kubernetes Architecture Hindi – Pods, Nodes, Cluster
Views: 339